Order Processing
2023-05-161. How to sync orders from Shipstation and manually add orders
1.1 Sync orders from ShipStation

If you click the "sync order" button, the following process will be automatically executed for syncing. Selected orders based on the tag chosen in the settings will be retrieved, and the time taken will increase with a larger amount of data. If an error occurs for any reason or if you selectively want to execute only a specific process, please execute the corresponding item for that process.
- Fetch ShipStation orders
- Import orders into Printflo
- Create items
- Create packing items
- Assign Bins
- Update order quantities
1.2 Manually add orders
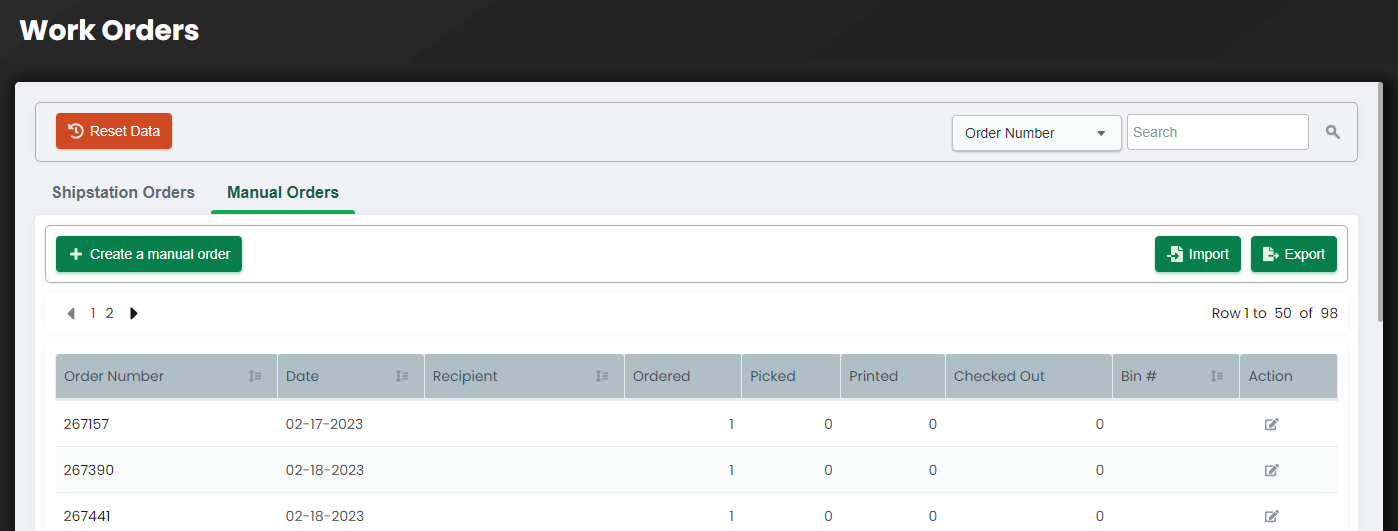
If you want to create a manual order, click on the 'Create a manual order' button. The creation of a manual order starts with generating an order header. Once the header is created, you will move to the order details interface where you can enter order items. You can import or export orders using the import/export button, allowing you to import orders from a CSV file or export them.
2. Instructions for displaying orders list and viewing order details
2.1 Work Orders
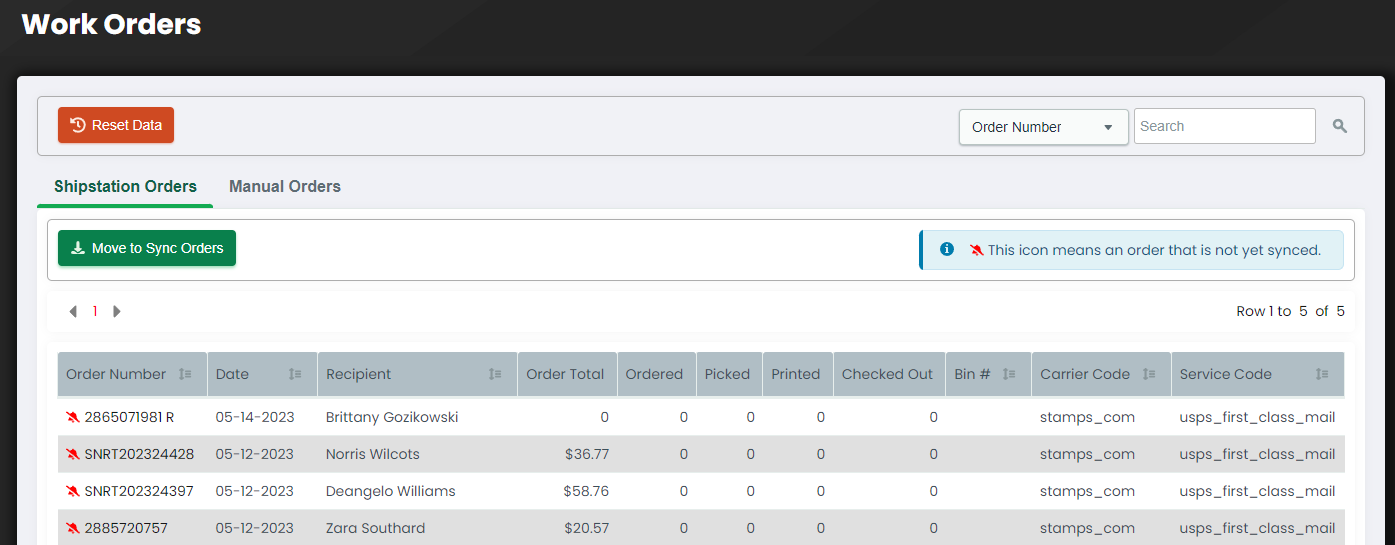
Work Orders screen shows the status of orders that the user has synced or orders that have been tagged in ShipStation but have not yet been fully synced. When the user enters an order number or bin in the search box, or alternatively, if you scan a QR code on the sticker, it will navigate to the corresponding order details screen.
2.2 Order Details

Users can view detailed information about the order and order items in the Order Details.
The menu options in Order Details are as follows:
-
Remove this order
You can delete the corresponding order, but please be aware that once deleted, it cannot be recovered. Please confirm before executing.
-
Add an item
You can manually add an order item.
-
Batch shipment
Based on the shipping information of the order, you can generate a shipping label.
-
Batch Queue Print (CADlink)
Users who have set CADlink as the default integration can send all order items as a batch to the queue.
3. Overview of the picking list feature
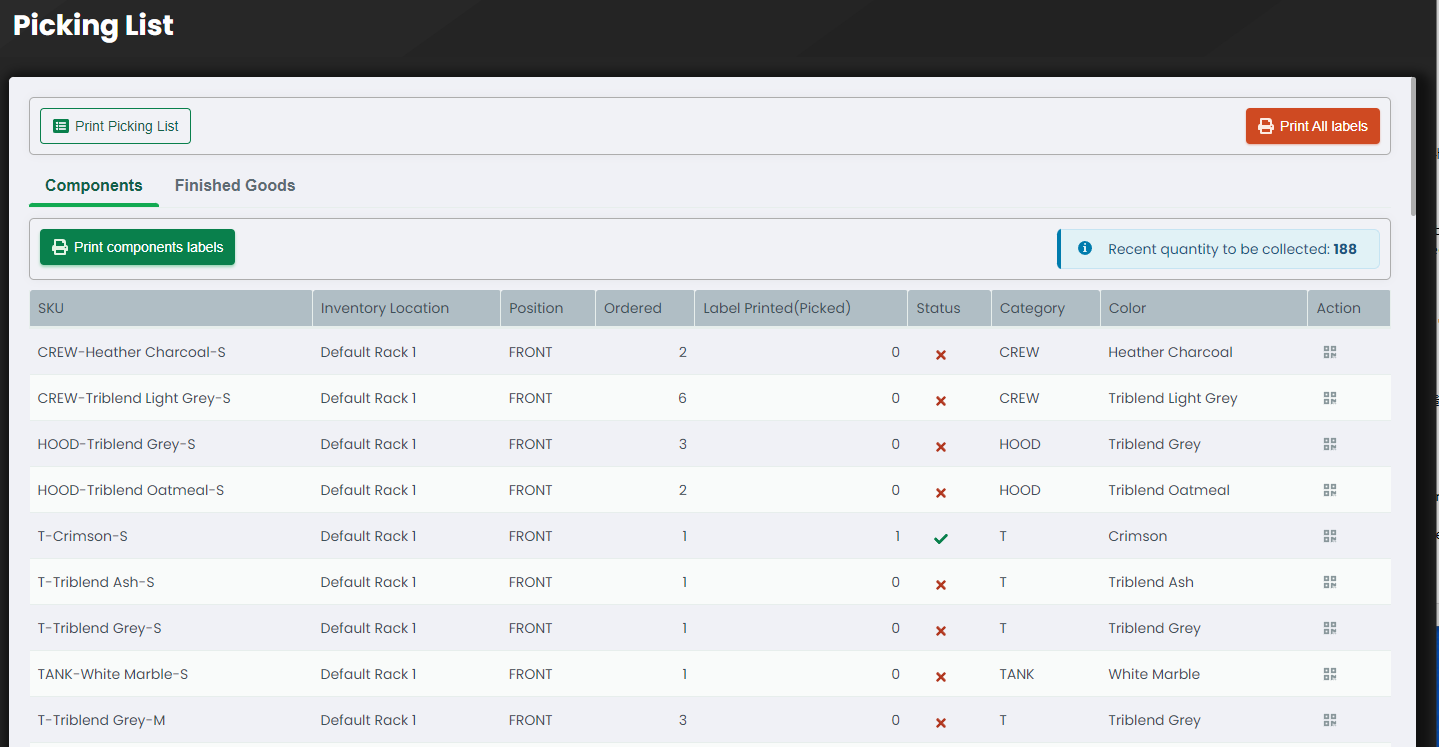
A picking list is a document compiled based on the synchronized order item information, which combines the associated components mapped to the respective product. It allows users to collect the components (raw materials) conveniently. Additionally, it enables printing of stickers displaying detailed information about the order item, including QR codes.
-
Print Packing List
The 'Print Packing List' option allows you to generate a report that needs to be collected as sheets rather than stickers. -
Print All Labels
You can print all the stickers that need to be picked up. -
Tabs
Components, printed film (DTF) with components, and finished goods are categorized, allowing you to view detailed information on a tab-based interface. You can also print the corresponding stickers.
4. How the QR codes on the stickers are used to process orders
The QR code contains the following string: MIC-HOOD-003-L-VAULT;232686345;380659402;FRONT. It is separated by commas. MIC-HOOD-003-L-VAULT represents the order item SKU, 232686345 represents the order ID, 380659402 represents the order item ID, and FRONT represents the printing position. The image below is a sample output of the sticker, and the description of each item is indicated in red.

5. Send Queue for printing
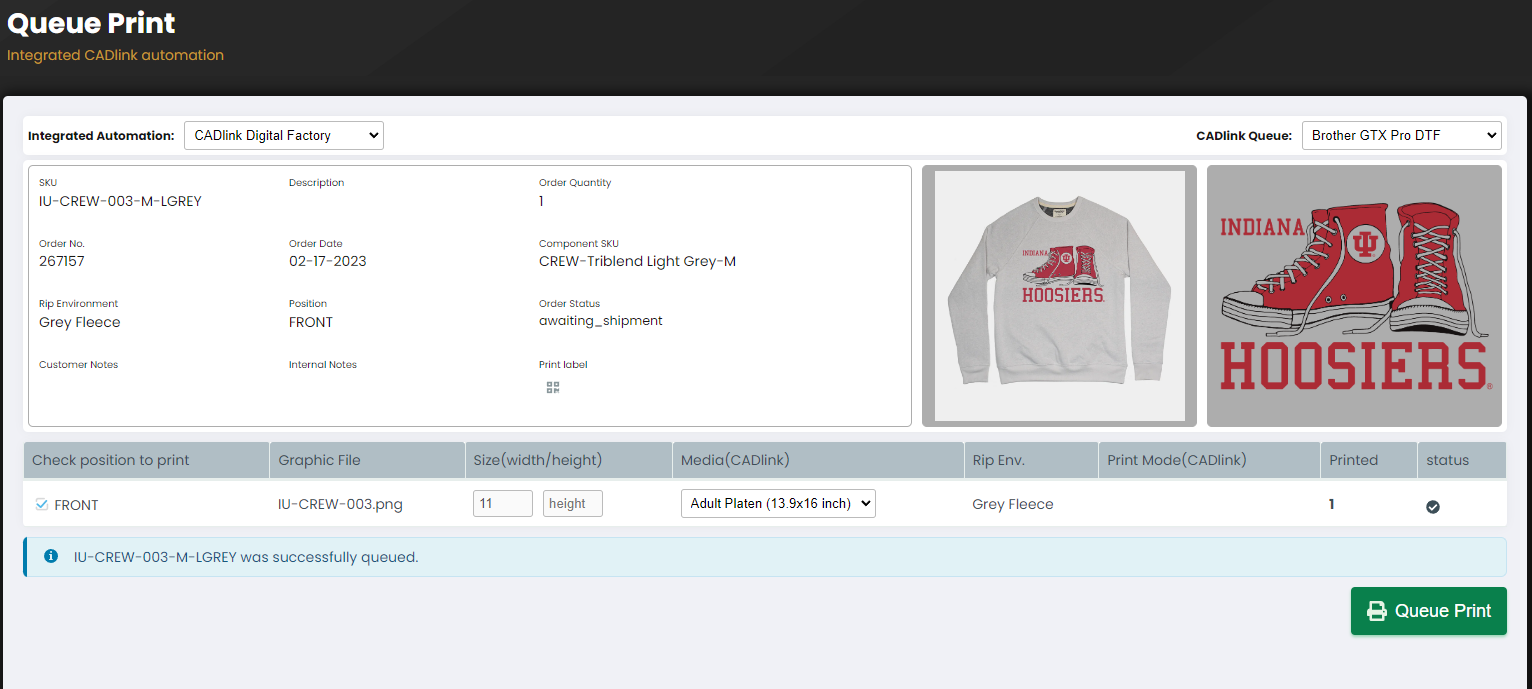
The Queue Printer interface allows users to send a print job to a designated queue using either the default integrated automation or a manually selected integration. This can be done automatically by scanning the QR code on the sticker or by manually triggering the 'Queue Print' action icon within the order details interface.
-
Integrated Automation
The default intergrated automation, which is set in the Settings, will be automatically selected. Users can choose from multiple integration options if available. -
CADlink Queue
When using the CADlink integration, users must select one of the queues that have been added in the CADlink settings.
The specific queue will be automatically choosen if the user's hostname matches with the hostname specified in the CADlink settings. -
Order information The order details will be presented along with a mock-up image and the artwork graphic image.
-
Graphic Position
The graphic details will be displayed along with the printing status. If the item requires multiple artworks to be printed on a garment, users can select one of the graphics positions to send it to the queue. -
Queue Print
The Queue Print button allows users to send the item to the queue after confirming its information. If the auto queue feature is enabled in the Settings, the item will be automatically added to the queue without the need for manual intervention.
6. Verify Shipment Items for Label Creation (BIN System)
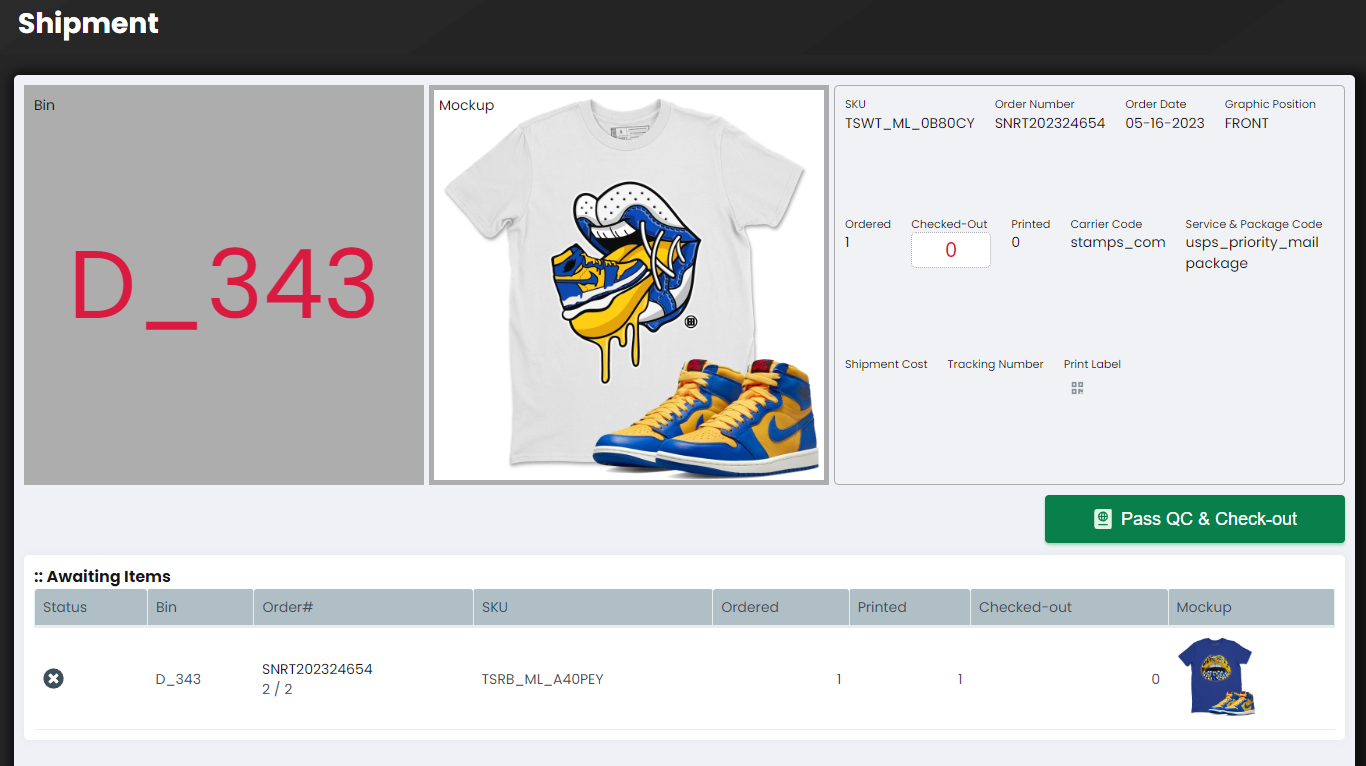
The user can scan the QR code on the sticker to check the status of the item and also monitor the status of other items belonging to the same BIN. During the shipping stage, after the user confirms the final quality control (QC), users can generate a shipping label and print it once all items have been checked out.
-
Bin
-
Mock-up
-
Order information
-
Awaiting items
Users can verify the status of items belongs to the same BIN. -
Pass QC & Check-out
Once all items have been verified and checked-out, users can view the full message and proceed to create a shipping label